Image Credit: Pixabay
Business owners often seek out ways to increase sales and customer retention. And 80 percent of business professionals believe that you can do that with email marketing. But email marketing means that you must build a list, an action most marketers either dread or feel clueless about.
Hence, this article aims to show you ways to build your email list and automate your marketing efforts.
How to Capture Emails
Marketers unthinkingly use email collection tactics that offend their users. However, the following methods would help you get emails without disturbing your users.
Use a Sticky Top Bar
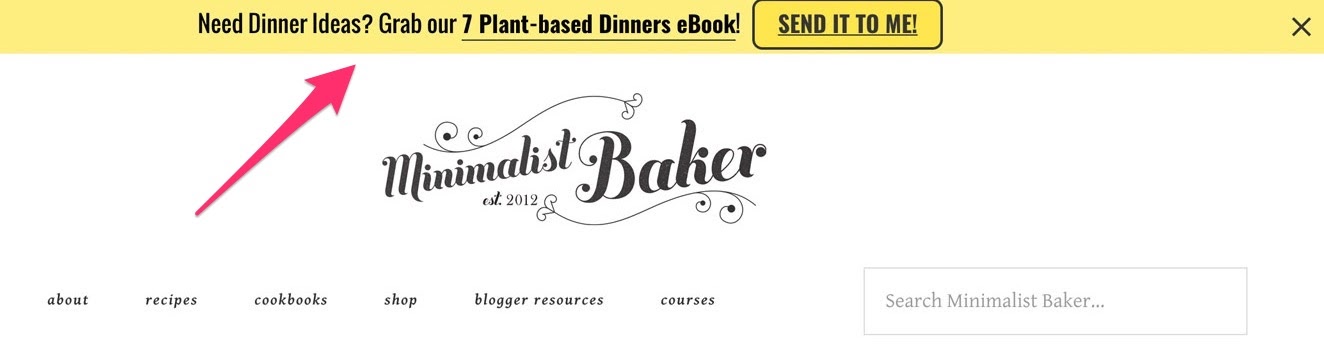
Your sticky top bar should be a simple but noticeable one that allows users to scroll without interference. A call to action is the usual message you’ll see on the top bar, but you might get a better result if you use it as a subscription call.
Offer a Content Upgrade
You can get a user’s email in exchange for an upgraded content. This upgrade can be a downloadable PDF within the content that they’re already enjoying.
Add a Sidebar
A sidebar is used mostly on blog pages to allow the user to navigate easily. So you can include a subscribe button as well since it’s always in view.
Stanford Smith, a blogger, reportedly increased his signups by 26 percent when he moved his signup form to the top of his sidebar.
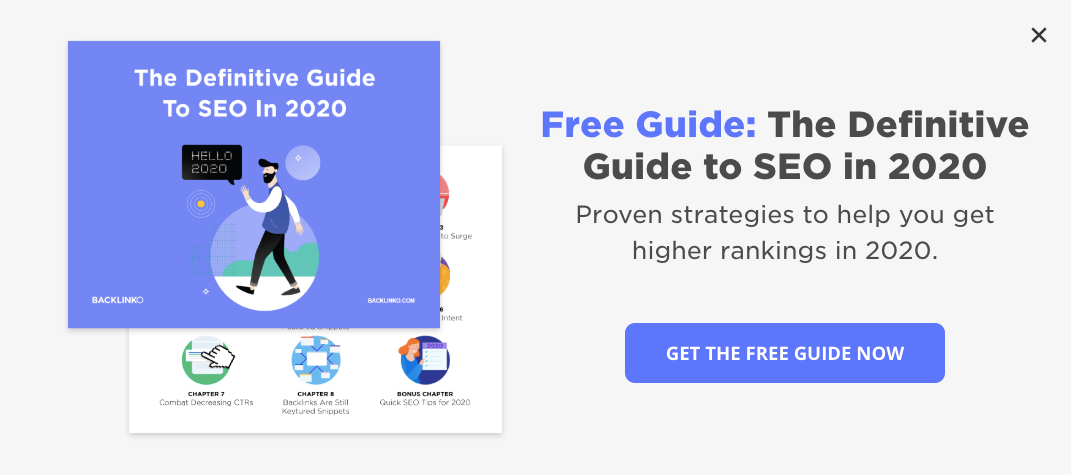
Show Pop-up at the End
Most visitors won’t decide to subscribe until they get to the end of the content. So triggering a pop-up as soon as they get to the end can act as a call to action. In most cases, users who weren’t interested in the beginning might change their minds but won’t go back up to subscribe.
Wait for Page Scrolls to Slide in a Request
Allowing a user to scroll through a certain percentage of your content before you slide in a request is one of the least offensive methods. You may want to let it come when the user has consumed four-fifth of the content.
Submit a Survey
You can design a survey to collect votes and insights, but it can also be a powerful tool for list building. You can use Qualaroo to set up a survey form and let it stay at the bottom corner of the screen.
Screenshot from Niel Patel
The University of Alberta used this method to increase their subscribers by 500 percent in just one year
Pop-up Triggered by Exit-intent
About 70 to 96 percent of users that leave your site would never come back. If you set up an exit-intent pop-up, it’ll trigger when someone is leaving. And with a tempting invitation, you can get their emails
Setting Up Automated Responses
Here’s how you can set up automated responses with MailChimp and Campaign Monitor.
Automation with MailChimp
MailChimp offers you the option of choosing between a pre-set automation and a customized one. The pre-set automation comes with defined timelines and triggers, while the customized automation allows you to set your parameters.
Follow these steps to start automation
1. Click the “Automate” feature on your MailChimp account dashboard and select “Email.”
2. Choose the automation you want by clicking the category tab that describes what you want.
If none of the descriptions match your needs, click “Custom” to create yours.
3. Select “Single email” or “Email series.”
4. Enter a campaign name and choose your audience from the drop-down
5. Finally, click “Begin.”
All price plans allow you to send single email automation, but not all plans support automated email series. And some types of automation have unique steps, as in the case of order notifications, abandoned cart messages, and retargeting emails. This unique automation, as well as date-based automation, are sent to subscribers more than once.
Automation with Campaign Monitor
Automated journeys help you engage your customers and ensure that they continuously return.
To start the automation, go to the journey designer in your campaign monitor account. In the “Automation” section, select “Create a new journey,” then name it when prompted. Then choose your audience or list to send your message to and choose a trigger.
Now you can start adding steps that’ll help you build and personalize the journey.
You click on the plus [+] button under a trigger whenever you want to add a step. Your step can be Delay, Email, or Condition
After you add a journey, another plus sign would show below it, signifying that you can have more steps.
The “Turn on Journey” at the top right is disabled till you complete the steps. But when you complete the process and turn on the journey, the button becomes a switch that you can turn on and off.
Wrap Up
You can test the different email collection techniques to decide which one works well with your customers, then automate.


