Overview
In the ever-evolving world of SEO, staying ahead of the curve is essential for optimizing your website’s visibility and ranking on search engine result pages. One effective technique that can give your website an edge is implementing schema markup. Schema markup allows search engines to understand the content on your website better, leading to enhanced search engine results and improved organic traffic.
Are you interested in adding structured data markup to your website? One problem: you lack coding skills or access to it. Fear not! You can do this yourself in nine easy steps with Google Tag Manager. After its introduction in 2011, schema.org is an important in SEO.
Sometimes referred to as schema markup, schema.org is a collection of schemas that can be used for structured data markup. This helps search engines better understand a website’s content. If your aim is to improve how your site’s listing appears in SERPs, then implementing this markup is the way to do it.
The benefits of implementing the schema structured data markup are great. These benefits include a competitive SEO advantage; it will drive additional traffic as well as increase your click-through rate, while improving organic search results in a cost-effective way.
One way that you can implement schema markup is to directly tag the HTML code on your website’s pages. This would require that you have a basic coding knowledge, as well as access to the Content Management System (CMS) and File Transfer Protocol (FTP).
The challenge that is often encountered by SEOs is that they don’t have the required coding skills and are restricted by company policies that restrict access to website files. Google Tag Manager can be used to overcome this challenge.
Whether you’re a beginner looking to optimize your website or an experienced marketer seeking to streamline your SEO efforts, this post will equip you with the knowledge and tools necessary to harness the power of schema markup and boost your website’s visibility on search engines.
So, let’s dive in and unlock the potential of schema markup with Google Tag Manager.
Using Google Tag Manager for Schema Markup
A free tool for marketers, Google Tag Manger allows you to add or update tags on your website without possessing any coding knowledge. It can be used to add snippets of code to your site without editing any of this website’s code. This snippet is the structured data markup.
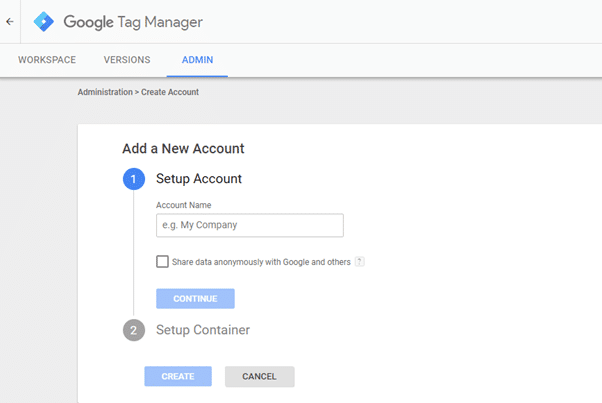
Use the following nine steps to add schema markup to your website with Google Tag Manager. These steps will guide you to adding organization schema markup using JSON-LD encoding. Before beginning, make sure you have Google Tag Manager set up.
Step 1: Creating a JSON-LD Markup
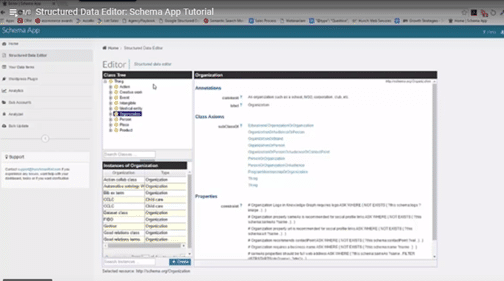
If you don’t have any knowledge of JSON-LD encoding, then visit SchemaApp.com and use the JSON-LD schema generator tool. You will need to enter the properties you wish to include in your schema markup. You can then simply copy the JSON-LD code to your clipboard.
Step2: Creating a New Custom HTML Tag
Using Google Tag Manager, create a new custom HTML tag and give it a descriptive name like “Organization Schema Markup”.
Step 3: Paste Your New Markup
Paste your new JSON-LD markup into the custom HTML text box.
Step 4: Save the Custom Tag
Click on the “save” button displayed on screen’s top right-hand corner. On doing so, a pop-up message stating “No triggers selected” will appear. However, you can continue by clicking the gray “save tag” button.
Step 5: Create a New Trigger for Page Views
Next, create a new trigger on which your tag will fire. Select the page views trigger from the list situated on the right-hand side of the screen. Give the trigger the name “Page View”. You will also be able to use this trigger for other tags that also require page views to fire.
Step 6: Configure your “Page View” Trigger
The next step is to configure the page views trigger that you have created. It is done in order to make sure that fire on all of the page views. Once you have done this, click the “save” button.
Step 7: Connect the ‘Page View’ Trigger to the Schema Markup Tag
Next, you will need to open the custom HTML Organization Schema Markup tag that was created in step 2. Select the ‘Page view’ trigger set it to make the tag fire. Finish this step by clicking the blue “save” button.
Step 8: Publish the Container on Your Google Tag Manager
Once you’ve reached this point, you will need to click the red “publish” button that can be found in the top right-hand corner.
Step 9: Run a Test of Your Markup Using Google’s Structured Data Testing Tool
The last step will be to test your schema markup. This can be done by using the Structured Data Testing Tool ensuring that it validates correctly.
Final Thoughts
Marketers are highly encouraged to take advantages of the potential benefits that structure the data markup. The simple implementation of using Google Tag Manager can be an advantage even if you do not have access to the web files required or are not familiar with the HTML code that this process requires.
This structured data markup is a very important part of any all-inclusive Sydney SEO solution. It is thus, recommended that you should implement schema types that are most applicable to your business. This will without a doubt give your website a competitive edge in the SERPs. It is also an extremely cost-effective way to increase your organic search results.
If you are interested in using schema’s structured data markup for your business, then please contact us at Shout for a free consultation.


